
Vegan Sweetened Condensed Milk
Sweetened condensed milk is a pantry staple that opens up a whole world of possibilities. Make your own at home with only a couple plant-based ingredients.
Skip to recipe ↓Sweetened condensed milk is one of those pantry staples that opens up a huge range of desserts — tres leches, key lime pie, fudge, dulce de leche, Vietnamese iced coffee, no-churn ice cream, and more.
The vegan versions you find in stores work, but they’re expensive, often loaded with gums and stabilizers, and the flavor is flat. Instead, make this version at home with only a few ingredients.
The Milk Matters
My preferred method is using coconut milk, and that’s what I do at the bakery. If you don’t like or have coconut milk, any plant-based milk can work with just a slight alteration.
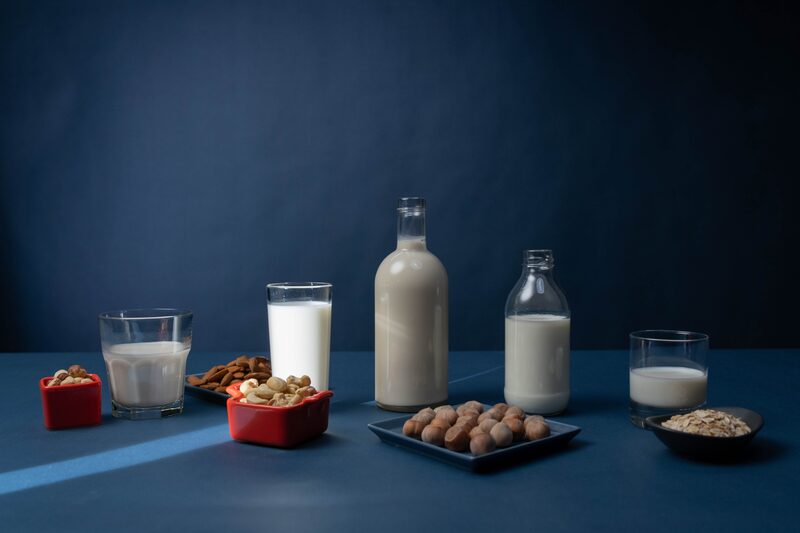
The key is adding a small amount of vegan butter to make up for the lower fat content and mimic the mouthfeel of dairy condensed milk. Without it, the finished product feels thin and reads more like syrup than condensed milk. Soy is the strongest choice here because of its protein content, although oat works well, too. Almond and cashew are workable but produce a less viscous result.
How to Tell When It’s Done — Two Methods
The target is the same regardless of which method you use: reduce the mixture to 40% of its starting weight. That means 60% of the water has evaporated off, leaving you with a concentrated, glossy, syrupy result.
The Skewer Method
Before you turn on the heat, dip a wooden skewer or chopstick straight down into the pot until it touches the bottom. Pull it out and mark the wet line with a pencil. That’s your starting volume. Then, mark a second line at 40% of that height from the bottom. That’s your target. Dip and check every 10 minutes as the mixture reduces.
This method works, but it’s not as accurate as weighing — the pot’s shape affects how the volume reads on the stick, and a pot with sloped sides will throw the measurement off.
The Scale Method
This is the more professional and precise method. It’s how I do it in the bakery and how I’d recommend doing it at home if you have a kitchen scale.
Weigh your empty pot first. Write the number down. (Or zero out the scale with the pot on it before adding ingredients — but writing it down lets you check mid-cook without dumping the contents.)
Calculate your target finished weight: add up the weight of all your ingredients, then take 40% of that number.
As you cook, check the weight by setting the whole pot on the scale. Subtract the empty pot weight from what the scale reads. That’s your current mixture weight.
Pull it off the heat when you hit your target.
Formula
| Starting Weight | Target Finished Weight (40%) | |
|---|---|---|
| Coconut milk | 550 g (400 g milk + 150 g sugar) | 220 g |
| Other plant milks | 515 g (400 g milk + 100 g sugar + 15 g butter) | 206 g |
Can You Microwave It?
Technically, yes, but I don’t recommend it.
You can reduce plant milk and sugar in the microwave by pulsing in 2-minute intervals on medium power, stirring between each pulse. It will work — water will evaporate, and you’ll end up with something condensed-milk-adjacent.
There are problems, though. The microwave heats unevenly, so you’ll get hot spots that scorch the sugar while the rest of the mixture is barely warm. You can’t see the surface boil pattern, which is one of the best visual cues that you’re cooking at the right temperature. The risk of boil-over is high — plant milks foam aggressively, especially soy, and a 4-cup measuring cup will overflow before you know it. And you have to stop and stir constantly, which negates the convenience.
If you really want to do it, use a wide, deep, microwave-safe bowl (at least 3x the volume of your starting mixture), set the power to 50%, and pulse in 90-second bursts with a stir between each. Expect it to take 25 to 35 minutes of active microwave time. Stovetop is faster, easier, and produces a better result.
How to Use It

Substitute 1:1 anywhere a recipe calls for sweetened condensed milk. Drizzle on coffee, swirl into oatmeal, use as the base for vegan dulce de leche (cook it down further until it caramelizes), fold into no-churn ice cream, layer in vegan magic bars. The coconut version has a tropical note that works beautifully in key lime pie or coconut-forward desserts. The neutral soy or oat version disappears into whatever you put it in.
Once you’ve made it once, you won’t go back to the store-bought stuff. The flavor is cleaner, the texture is better, and the cost per batch is a fraction of what you’d pay for a can.
Vegan Sweetened Condensed Milk

Ingredients — Coconut Milk
- 400 g full-fat coconut milk (canned, unsweetened)
- 150 g cane sugar
- Pinch of salt
Ingredients — Other Plant Milks (soy, oat, almond, cashew)
- 400 g unsweetened plant milk
- 100 g cane sugar
- 1 tablespoon (15 g) vegan butter
- Pinch of salt
Instructions
- Combine everything cold. Whisk the milk, sugar, butter (if using), and salt together in a heavy-bottomed pot before turning on the heat. This dissolves the sugar evenly and prevents scorching.
- Simmer at medium-low heat. On a gas stove, that’s roughly a 3 or 4 out of 10. On induction, around 4 to 5, or set to 200°F if your unit allows. Surface temperature should sit between 180°F and 200°F.
- Stir every few minutes. Use a silicone spatula and scrape the bottom and corners of the pot. Sugar settles and scorches if you don’t.
- Reduce until you hit your target weight. This takes 30 to 45 minutes, depending on your pot, heat, and starting volume.
- The mixture thickens further as it cools — don’t overcook it. If it looks slightly thinner than commercial condensed milk while hot, you’re in the right place. Store in a sealed jar in the fridge for up to 2 weeks.
Heat Discipline Matters
Above 212°F, you’re boiling, which agitates milk proteins (especially in soy) and scorches faster. Above 230°F, your sugar starts to caramelize, which changes the flavor and color. You want water to evaporate, not sugar to brown.

The perfect drizzle
Cook this condensed milk down into dulce de leche and pour it warm over a batch of Sensible Edibles sourdough cinnamon rolls. Sticky, glossy, unforgettable.
Shop at Sensible →