Bakery Style Muffins With the Creaming Method
Here’s the professional creaming technique I use at the bakery, plus a gluten-free vegan vanilla muffin recipe.
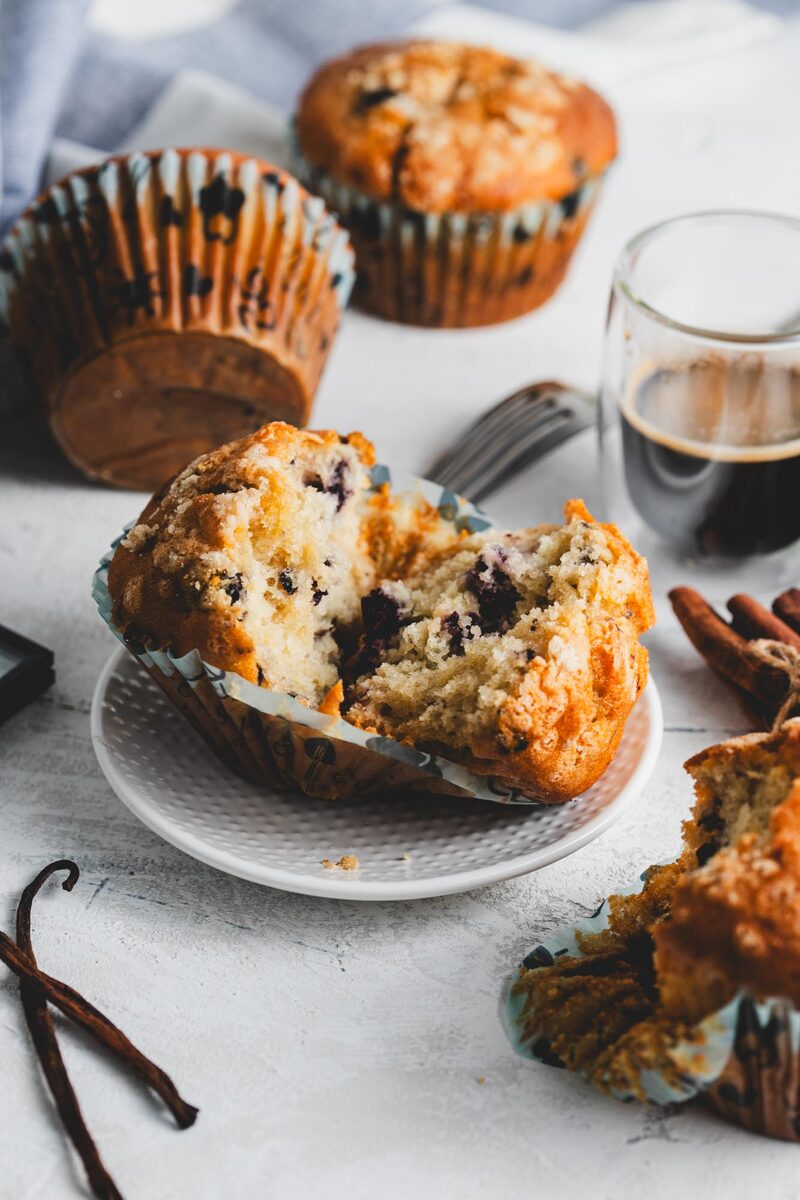
Skip to recipe ↓Most muffin recipes tell you to dump the wet into the dry, stir until just combined, and call it a day. That works. But if you’ve ever wondered why bakery muffins have that tall dome and tender, cake-like crumb while yours come out flat and dense, the answer usually isn’t the recipe. It’s the mixing method.
I run a gluten-free and vegan bakery, and this one technique is the difference between a good muffin and a great one. Here’s how it works and why.
Where Muffin Lift Actually Comes From
Muffin batter rises from two sources of aeration: chemical leavening, your baking powder and baking soda, and steam generated in the oven.
The standard mixing method relies entirely on those two things. You whisk your wet ingredients in one bowl, your dry ingredients in another, then fold them together just until no dry streaks remain. Done. It’s fast, it’s forgiving, and the only thing you need to worry about is not overmixing. When in doubt, leaving some lumps is fine. Chasing a smooth batter is how you end up with dense, gummy, tunneled muffins.
Taking It One Step Further: Creaming
Swap your oil for a solid fat — butter, vegan block butter, solid coconut oil, or vegetable shortening — and you unlock a third source of leavening: air pockets built up through beating your sugar and fat together.
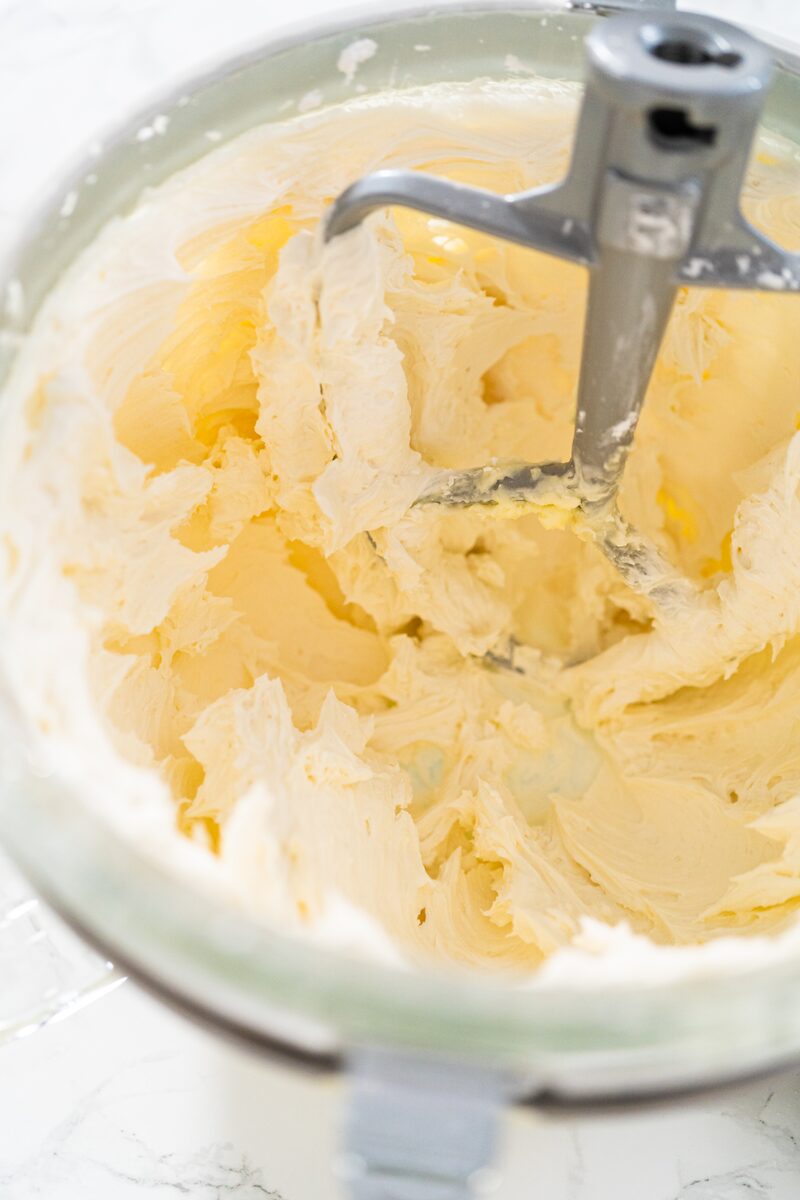
It works like this: when you beat sugar into a solid fat, the sharp sugar crystals physically cut microscopic air pockets into the fat and the fat holds them in place. Those trapped air bubbles become the foundation your chemical leavening expands during baking. More creamed-in air means more lift, a finer crumb, and that tender, mini-cake texture. This is what I do at the bakery to guarantee a good rise.
Choosing Your Solid Fat
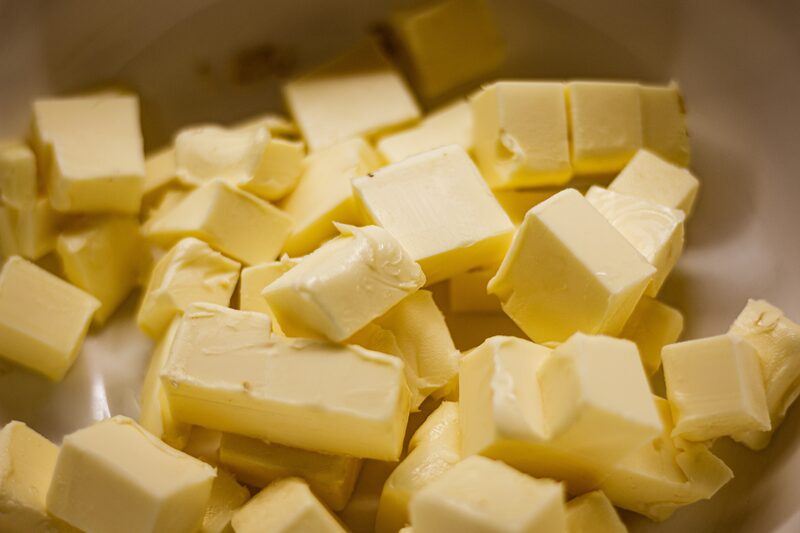
Vegan block butter is my default. It has good flavor and creams well. It also warms up faster than dairy butter, so keep it cool.
Solid coconut oil works when it’s actually solid (below ~76°F). It’s firmer and more brittle than butter, so bring it to just pliable before creaming.
Vegetable shortening is the most forgiving option. It’s 100% fat with no water, stays solid across a wide temperature range, and holds air reliably. The tradeoff is zero flavor, so many bakers cream shortening for structure and blend in some butter for taste.
How to Cream, Step by Step
- Get your fat temperature right. Cool but pliable — it should give when you press it, not feel greasy or start to melt. This matters more with vegan block fats and coconut oil, which have lower melt points and warm up quickly. If your fat looks shiny or slides around the bowl, it’s too warm. Chill it briefly to get back to the temperature you need.
- Loosen the fat. Beat it alone on medium speed for 30 to 60 seconds, until smooth. You’re just prepping it to accept air.
- Add the sugar and cream. Add your sugar and beat on medium-high for 3 to 5 minutes. This is the creaming. Don’t rush it — the sugar crystals need time to work air into the fat.
- Watch for the color, not the clock. You’ll know it’s done when the mixture turns pale, looks fluffy, and has increased in volume. Don’t overwork it past this point, or you’ll knock the air back out and lose everything you just built.
- Scrape, then add eggs gradually. Scrape down the bowl. Add your eggs or egg substitute in stages on low speed, scraping between additions, so the mixture stays emulsified and doesn’t break.
- Alternate dry and liquid. Add your dry ingredients and remaining liquid in turns — dry, liquid, dry, liquid, dry, starting and ending with dry. Keep it on low and mix just to combine each time. This is the stage where overmixing does its damage, so go gently.
And you’re done. You just made the highest-quality muffins — these are basically mini cakes.
One Note for Gluten-Free Bakers
If you’re baking gluten-free like I am, the “don’t overmix” rule still applies, but for a different reason. There’s no gluten to toughen. What you’re protecting instead is the hydrocolloid network made from the xanthan gum, psyllium, and starches doing the structural job gluten normally does. Overmixing will shear that network apart and knock out your air, giving you the same dense result. Mix gently, and once your batter is combined, let it rest 15 to 20 minutes before scooping so the flours fully hydrate. It rises better than mixing longer ever would.
Gluten-Free Vegan Vanilla Muffins (Creaming Method)
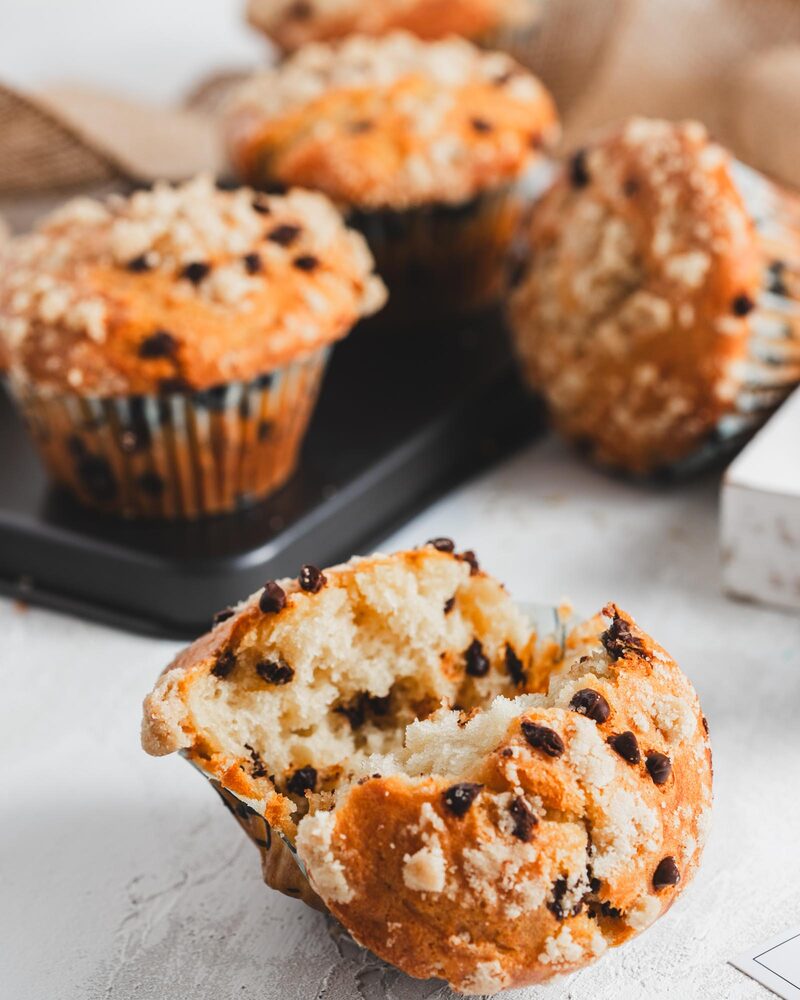
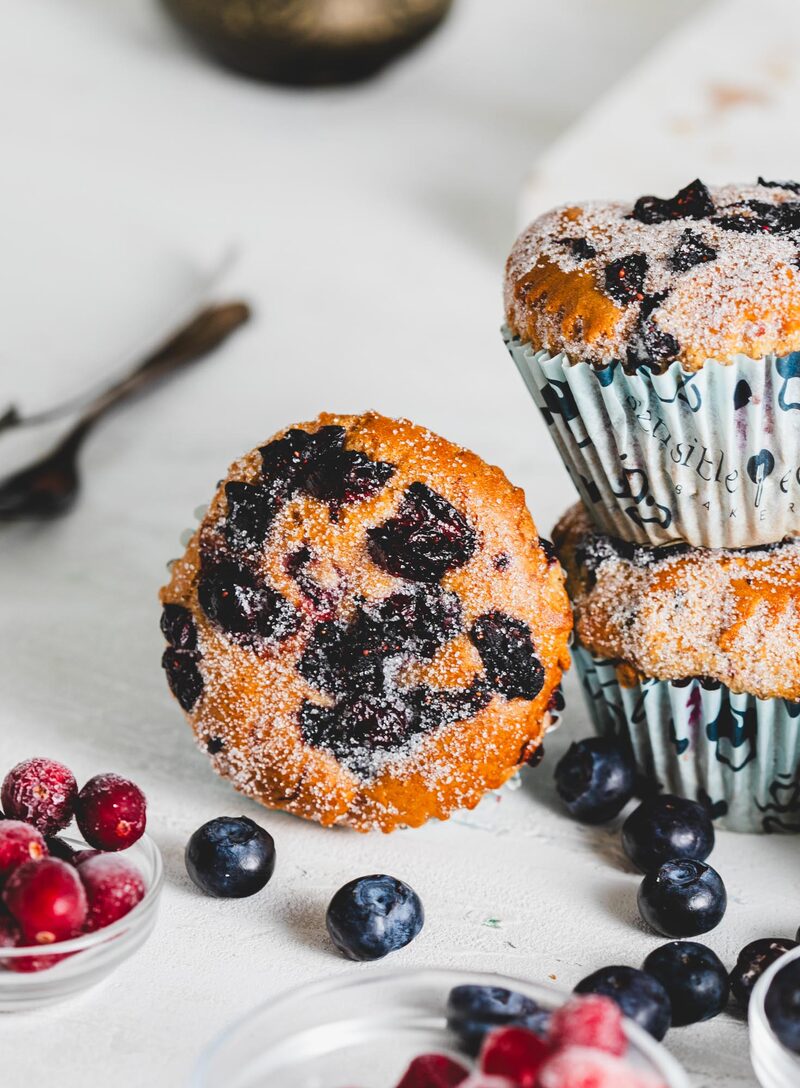
Makes 12 muffins. These bake up tall and tender — the creaming method gives them a cake-like crumb you won’t get from an oil batter.
Ingredients
Fat and sugar
- 1/2 cup (113 g) vegan block butter, cool but pliable
- 3/4 cup (150 g) granulated sugar
Wet
- 2 flax eggs (2 tbsp ground flax + 6 tbsp warm water, rested 10 min), or 1/3 cup aquafaba
- 1 tsp vanilla extract
- 3/4 cup (180 ml) plant milk, room temperature
Dry
- 2 cups (280 g) gluten-free flour blend (with xanthan, or add 3/4 tsp psyllium husk powder)
- 1 tbsp baking powder
- 1/4 tsp baking soda
- 1/2 tsp salt
Method
- Preheat oven to 375°F (190°C) and line a 12-cup muffin tin.
- Whisk the dry ingredients together in a bowl until evenly distributed. In a separate container, combine the plant milk and vanilla.
- In your mixer, beat the vegan butter alone on medium for 30 to 60 seconds until smooth.
- Add the sugar and cream on medium-high for 3 to 5 minutes, until pale and fluffy.
- Scrape the bowl. Add the flax eggs (or aquafaba) gradually on low, scraping between additions.
- Alternate the dry mix and the milk in additions — dry, liquid, dry, liquid, dry — on low speed, mixing just to combine each time. Stop as soon as no dry streaks remain.
- Let the batter rest 15 to 20 minutes so the flours hydrate.
- Scoop into the tin, filling each cup about three-quarters full. Bake 18 to 22 minutes, until a toothpick comes out clean and the tops spring back.
- Cool in the tin 5 minutes, then transfer to a rack.
Make it your own: Fold in a cup of blueberries or chocolate chips by hand at the very end, after the batter is mixed. Toss them in a little of your flour blend first to keep them from sinking.
Want the muffins without the work?
Get the same tall, tender, bakery-style crumb fresh from our kitchen — gluten-free and vegan, no creaming required.
Shop at Sensible →